
Herbs have so many benefits but they only grow for so long. Learn how you can turn your homegrown herbs into dry herbs.

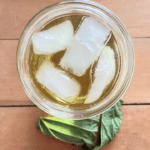
The world of herbs is gigantic! You can use herbs to cook with, make infused oils and even make tinctures for health.
Whether you are just getting into herbalism or you are into from-scratch cooking, having dried herbs on hand will be beneficial.
Growing your own herbs has many benefits, but it also comes with the satisfaction of knowing you can grow your own food.
There is definitely something special about sitting down to a meal only to look around the table and see that everything there you grew yourself.
Herbs are a great place to start if you are trying to get closer to growing all your own food. They are fairly low maintenance and are easy and cheap to grow.
Dry herbs can be expensive, why not grow your own herbs to dry yourself!
This post contains affiliate links. This means I may earn a small commission on qualifying purchases at no extra cost to you. Read my full disclosure here.
Why grow your own dried herbs?
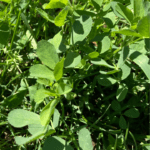
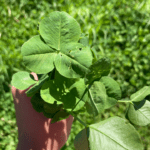
You can grow your own herbs very easily. All you need to grow your own herbs is a pot of soil or a small area of a flower bed.
Take some herb seeds and plant them in the dirt according to the package instructions.
You will soon have homegrown herbs that you can use fresh or dry the herbs for later enjoyment.
Herbs are very nutrient dense. However, when herbs are dried and packaged for a long period of time, they loose some of their nutritional value.
This is why growing your own herbs can help boost your nutrition.
Not only will you have organically grown herbs, but they will also be budget-friendly, and super fresh.
3 Methods to drying herbs
Here are three easy ways you can start drying your own herbs today.
1. Hang them up.
2. Dry them in the oven.
3. Dry them on the counter.

Dry herbs by hanging them up
This method is not only effective, but also is pretty in the process!
Make sure before you start to wash your herbs and pat them dry.
To dry herbs by hanging them, you will need some herbs with the stems attached and some string or twine.
Bunch the herb stems together. Take a piece of twine or string and wrap it around the herb stems, tying it tight.


Hang it up somewhere out of the way. The herbs will take around 7-9 days to dry using this method.
Dry herbs in the oven
Wash the herbs and pat them dry with a towel.
Strip the leaves of the herbs off of their stems.
Lay the herb leaves on a cookie sheet.

Bake the leaves in the oven at 170-200 degrees fahrenheit. Check on the herbs and stir them every 10 minutes.
This process should take somewhere around 30 minutes, but keep a close eye on the herbs because they can be done sooner than that.
Dry them on the counter
To dry herbs on the counter (or any flat surface) start by washing the herbs and patting them dry.
Next, take the leaves off the stems, or leave the herbs whole, or chop the herbs.
To dry chives like I did below, you can either leave them whole or chop them slightly.


Lay the herbs onto a tea towel, plate or baking dish in an area that you won’t need to use for several days.
Let the herbs dry for about 5-7 days.
How to store your dried herbs
Lightly pack your herbs into air-tight containers.
You can store your herbs like this for up to 1 year. However, for maximum flavor, you will want to use the dried herbs within 3 months.
You can also store your dried herbs in the freezer for longer, and it will also help retain the flavor of the herbs.
If your dried herbs are getting older, they won’t go bad as long as they have been throughly dried, they simply loose flavor.
Don’t throw out the herbs, though, you can still use them. Just add more dried herbs than you usually would.

How to substitute dried herbs for fresh herbs
To use your dried herbs instead of fresh herbs in a recipe, use the ratio of 1:3 dried to fresh.
Example: if a recipe calls for 1 tablespoon of fresh herbs, add 1 teaspoon of dried herbs.
Why do you use less dried herb than fresh herb?
Dried herbs have a lower water content than fresh herbs. This makes dried herbs more concentrated and therefore more potent.
Shop this post
Pin it for later


Leave a Reply