
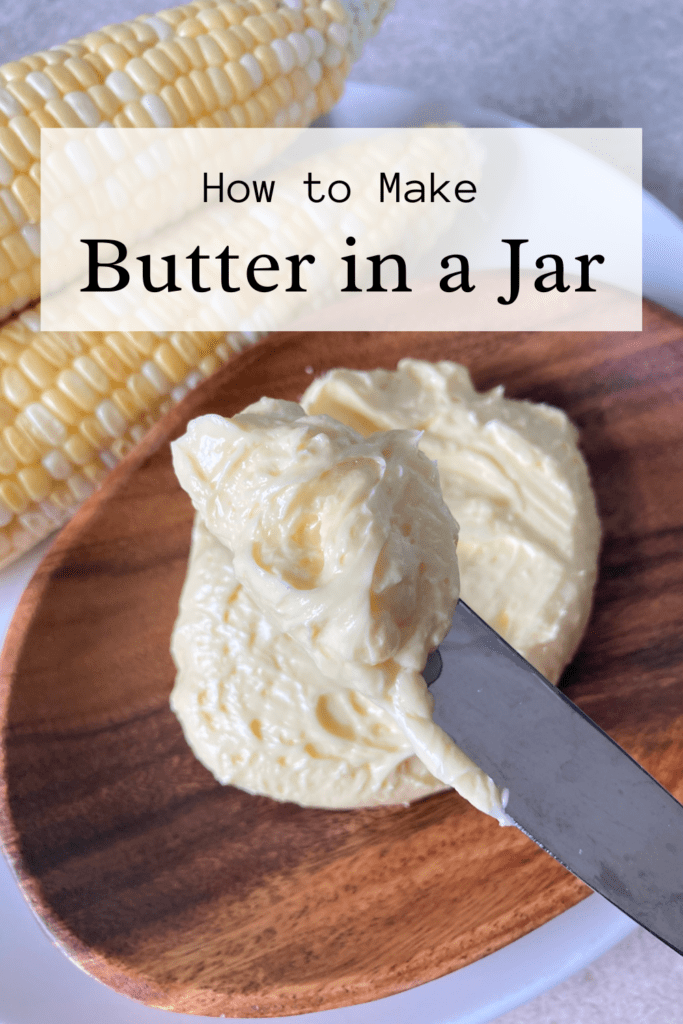
Making your own homemade butter is one of the easiest and most satisfying homesteading skill to master. Whether you are buying milk and cream, or you have your own dairy cow, you will love the flavor of this delicious homemade butter!
Jump to Recipe
When I was growing up, one of my favorite foods was homemade bread with a thick layer of salty homemade butter spread on it.
This is still on my top five favorite foods.
Making butter is a skill that has been ingrained in me since childhood because I was fortunate enough to get to grow up making butter every week.
Mom would take the jars of cream out of the fridge and put them on the counter in the late morning.
This would let the jars get a little bit warmer then fridge-cold. Making butter goes so much faster when your cream is not super chilled.
After lunch we would all grab a jar and start shaking it up.
It seemed like it took forever to get all the cream shook, but it was well worth the effort!
If you have massive amounts of cream you need to make into butter and you don’t have a bunch of kids you may want to use a different method rather than this shake-the-jar method. 😁
That was some great phy ed classes! Walk in circles shaking a jar ferociously.
This post contains affiliate links. This means I may earn a small commission on qualifying purchases at no extra cost to you. Read my full disclosure here.

What kind of cream works for making butter?
Store bought and farm fresh cream will work the same for making butter.
The biggest difference in fresh and pasteurized/homogenized cream is the nutrient qualities.
Farm Fresh Raw Cream
The best option for making butter is raw cream because there will be way more omega 3 fatty acids, vitamins, and minerals left in it.
To get the cream out of your farm fresh milk, simply put the milk in a gallon jar into the fridge and let it completely chill.
The cream will naturally rise to the top of the milk. Use a 1/4 cup measuring cup or a small ladle to skim the cream off the milk.
Butter made from raw dairy will tend to not last near as long as butter made from pasteurized cream. Because of this, you may want to store your butter in the freezer if you don’t use it within the first 3 days after making it.
Store-Bought Cream
You can buy pints or quarts of heavy or whipping cream at your local grocery store to make butter.
Just pour the cream in a jar and you are ready to make butter!
If you are able to, try to buy grass-fed cow’s cream. Even better if you are able to buy raw cream (will depend on the dairy law in your area).
The less processed the cream is, the more nutrients will be retained in the cream!
Butter made from pasteurized cream will last longer than raw cream butter will last.

Equipment
For this method of making butter you will only need a quart jar with a lid, a strainer and a bowl.
Make sure your lid is screwed on tight before you start shaking otherwise you will end up with cream everywhere!
Although I love these lids for storage, these lids are better for making butter with.

How to Make Butter
Pour 2 cups (1 pint) of cream into a 1 quart mason jar. If you have time, let this set out at room temperature for 1-2 hours, it will make the process go much faster.
Screw a metal lid on the mason jar, making sure it is very tight!
Start shaking the jar. The cream will then go through 3 stages to be made into butter.
Stage 1
Cream-you just started shaking. Keep shaking it!

Stage 2
Whipped cream-several minutes of shaking your cream will feel heavier and thicker. Keep shaking!

Stage 3
Almost butter-after a few more minutes of shaking, clumps of fat will start forming. These lumps are butter! You’re almost there, but keep shaking.
Stage 4
Butter-Keep shaking until all of the little clumps form into a big lump of butter. The ‘buttermilk’ will be much thinner and almost watery compared to the cream you started with.

Once you have gone through all four stages, you are ready to move onto straining off the liquid and washing your butter.
Pour the whole jar of buttermilk and butter into a strainer over a bowl. Either save the buttermilk for other recipes or discard.

Now move onto washing your butter to get a butter that will last much longer.
Why you Need to Wash you butter
The biggest reason you need to wash your butter is that it will last much longer than if you didn’t wash it.
If you do not get all of the buttermilk out of the butter, the buttermilk will spoil in the butter making the whole lump of butter spoil.
Butter lasts so long because it is mostly fat. So, the less non-fat substances you can get out of your butter, the longer it will last.
This is why ghee lasts so long. In the process of making ghee you cook and strain off all of the non-fat particles leaving you with a pure fat.

how to wash your homemade butter
Place your clump of butter into a bowl.
Pour cold water over the butter and begin to knead it with the back of a wooden spoon.

Fold the butter over itself and press to get the buttermilk out of it.
Pour the water off and add more cold water.
Repeat this process 3-4 times until the water is still clear even after you kneaded the butter in it.
After the last batch of water is poured off, press as much water out of the butter as you can.
Next salt the butter with about a 1/4 teaspoon of salt, if desired.
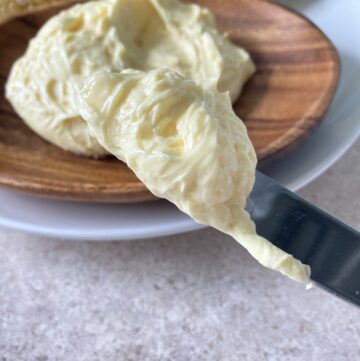
Then push the butter into a butter mold, form it into a log or roll it into a ball.

Homemade Butter
Equipment
- 1 mason jar quart
- 1 lid
Ingredients
- 2 cups cream heavy or whipping
- 1/4 tsp salt optional
Instructions
- Pour cream into mason jar. Let this sit at room temperature for about 1-2 hours if you have the time (it make the process go much faster).
- Screw the lid onto the jar, tightly.
- Shake the jar of cream until clumps form.
- Continue shaking until the clumps of butter form into a large clump of butter. This should take anywhere from 5-15 minutes.
- Pour the contents of the jar through a strainer, saving or discarding the buttermilk.
- Place the butter into a medium sized bowl.
- Add cold water to the butter.
- Begin kneading the butter into itself with the back of a wooden spoon.
- Once the water turns cloudy, pour off the water and add fresh cold water.
- Repeat this process until the water remains clear after kneading the butter in it (About 4 times.)
- Strain all the water off and knead the salt into the butter if using salt.
- Push the butter into a butter mold and freeze or form the butter into a log or ball.
Notes
Pin it for later
Shop this post
Other posts you may be interested in
Do you make your own butter?
What is your favorite way to make butter? Let us know what your favorite method for making butter is in the comment section!


Does this have to be stored in the refrigerator after making it?
Hi Kathy,
It is best to store homemade butter in the fridge if you aren’t going to be using it within 1 to 2 days. If you use raw cream, however, always store the butter in the fridge or freezer, as it goes bad quite fast.
Hope this helps!
Thank you. I’m making it today.